

Blog
How to Use the Myle Pod Device: A Complete Beginner’s Guide

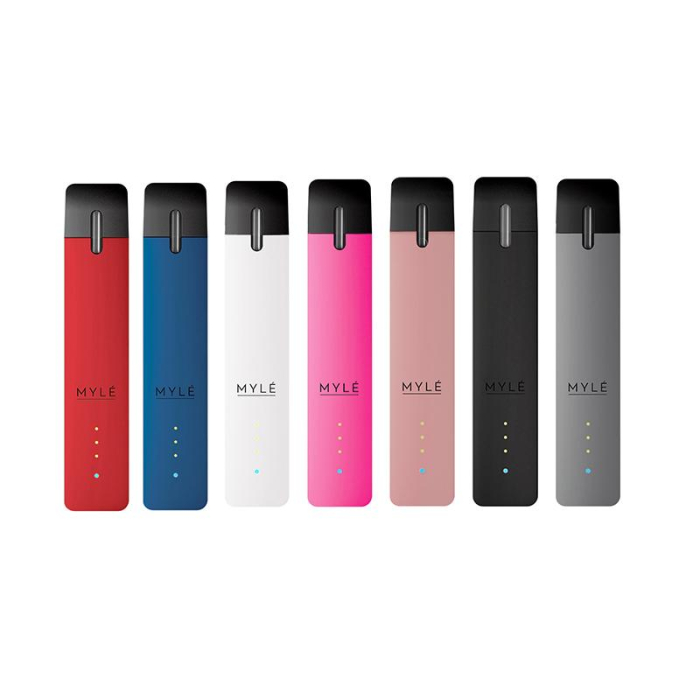
The Myle Pod Device is one of the most popular closed-pod vaping systems available today. Known for its sleek design, portability, and ease of use, the device is designed for adult users who want a simple vaping experience without dealing with complicated settings, refilling e-liquid, or changing coils. Whether you are using a Myle device for the first time or looking to get the best performance from your pod system, understanding how to use it correctly can help ensure a smooth and satisfying experience.
This comprehensive guide explains everything you need to know about using a Myle Pod Device, from setup and charging to inserting pods and maintaining the device.
What Is a Myle Pod Device?
A Myle Pod Device is a compact, rechargeable vape device that works with pre-filled pods. Unlike traditional vape kits that require users to manually refill e-liquid and replace coils, Myle pods come pre-filled and are designed for quick and convenient installation.
The device consists of two primary components:
- The rechargeable battery device
- The pre-filled pod cartridge
When combined, these components create a simple and user-friendly vaping system suitable for beginners and experienced users alike.
What Comes in the Box?
Depending on the model, a typical Myle Pod Device package may include:
- Myle battery device
- USB charging cable
- User manual
- One or more pre-filled pods (varies by package)
Before using the device, inspect all contents to ensure everything is included and in good condition.
Step 1: Charge the Device Before First Use
Although some Myle devices may arrive partially charged, it is recommended to fully charge the battery before using it for the first time.
How to Charge
- Connect the charging cable to the device.
- Plug the cable into a USB power source.
- Allow the battery to charge completely.
- Disconnect the charger once charging is finished.
Charging Tips
- Use the recommended charging cable.
- Avoid overcharging the battery.
- Charge on a flat, dry surface.
- Keep the device away from excessive heat.
A fully charged battery helps provide consistent performance and a better vaping experience.
Step 2: Remove the Pod from Its Packaging
Myle pods are individually sealed to maintain freshness and flavor quality.
Before installing the pod:
- Remove the pod from its sealed package.
- Check for any protective caps or silicone plugs.
- Remove all protective coverings.
Inspect the pod carefully to ensure it is intact and free from visible damage.
Step 3: Insert the Pod into the Device
Installing a Myle pod is simple and takes only a few seconds.
How to Install the Pod
- Hold the device upright.
- Align the pod with the opening at the top of the battery.
- Gently push the pod into place.
- Ensure the pod fits securely.
Most Myle devices use magnetic connections that automatically lock the pod into position.
Once inserted, the device is ready for use.
Step 4: Start Vaping
One of the biggest advantages of the Myle Pod Device is its draw-activated technology.
How It Works
Unlike devices that require buttons, the Myle activates automatically when you inhale through the mouthpiece.
Simply:
- Place the mouthpiece between your lips.
- Take a gentle puff.
- The device automatically produces vapor.
There is no need to press any buttons or adjust settings.
Best Inhalation Technique
For the best experience:
- Take slow, gentle draws.
- Avoid very hard puffs.
- Allow a few seconds between puffs.
Gentle inhalation often provides smoother vapor production and helps preserve pod performance.
Understanding Battery Indicators
Many Myle devices include LED indicator lights that communicate battery status.
Common LED Functions
- Solid light during use indicates normal operation.
- Flashing light may indicate a low battery.
- Charging light appears when connected to power.
- Full charge indication appears when charging is complete.
Consult the device manual for model-specific light patterns.
When to Recharge the Device
Over time, the battery will naturally lose charge and require recharging.
Signs the Battery Needs Charging
- Reduced vapor production
- LED warning signals
- Device stops activating
- Shorter vaping sessions
Recharge the battery whenever these signs appear to maintain optimal performance.
How to Replace a Pod
Eventually, the pod will run out of e-liquid and need replacement.
Signs a Pod Is Empty
- Reduced flavor intensity
- Weak vapor production
- Dry or burnt taste
- Visible reduction in e-liquid
Replacing the Pod
- Remove the old pod.
- Dispose of it responsibly.
- Open a new pod package.
- Insert the new pod into the device.
The replacement process takes less than a minute and requires no special tools.
Tips for Getting the Best Performance
To maximize the performance and lifespan of your Myle device, consider the following recommendations.
Keep the Device Clean
Regularly wipe the pod connection area using a dry cloth.
This helps:
- Maintain electrical contact
- Improve performance
- Prevent debris buildup
Store Properly
Keep your device:
- Away from direct sunlight
- Away from moisture
- At moderate temperatures
- In a protective case when traveling
Proper storage helps preserve battery health and pod quality.
Use Genuine Pods
Using authentic Myle pods helps ensure:
- Consistent flavor
- Proper device compatibility
- Reliable performance
- Better safety standards
Always purchase pods from reputable retailers.
Common Issues and Solutions
Device Not Producing Vapor
Possible causes:
- Battery needs charging
- Pod not installed correctly
- Pod has reached the end of its lifespan
Solutions:
- Recharge the battery
- Reinsert the pod
- Replace the pod if necessary
Weak Flavor
Possible reasons:
- Pod nearly empty
- Battery low
- Extended pod usage
Try charging the battery or installing a fresh pod.
Device Not Recognizing Pod
If the pod is not working properly:
- Remove and reinstall the pod
- Clean the connection points
- Check for damage
If the problem persists, replace the pod.
Safety Recommendations
Following basic safety practices can help maintain device performance.
Important Safety Tips
- Keep away from children and pets.
- Avoid exposing the device to extreme temperatures.
- Do not attempt to modify the device.
- Use compatible charging equipment.
- Follow manufacturer instructions.
Responsible use helps ensure a safe and enjoyable experience.
Advantages of Using a Myle Pod Device
Many adult users choose Myle devices because of their simplicity and convenience.
Key Benefits
- Easy operation
- Compact design
- Portable size
- Rechargeable battery
- No coil replacement
- No e-liquid refilling
- Consistent flavor delivery
- Beginner-friendly functionality
These features make Myle one of the most accessible pod systems available.
Conclusion
The Myle Pod Device is designed to provide a straightforward and convenient vaping experience for adult users. With its rechargeable battery, pre-filled pods, draw-activated technology, and maintenance-free operation, the device eliminates much of the complexity associated with traditional vape systems. By charging the battery, inserting a compatible pod, and taking gentle draws, users can begin using the device within minutes.
Proper charging, storage, pod replacement, and routine cleaning can help maximize performance and extend the life of the device. Whether you are new to pod systems or simply looking for a reliable and portable vaping solution, understanding how to use the Myle Pod Device correctly will help you enjoy a smooth, consistent, and hassle-free